«Real men don't use backups, they post their stuff on a public ftp server and let the rest of the world make copies»
- Linus Torvalds
This article is a guide to installing Arch Linux without big problems. It includes the author's thoughts, some theory and links to useful resources that you should study. Install this distro isn't easy and sometimes i forget how to do it :D
Content of this guide:
Do I need it?
Arch Linux is a great tool in the hands of an advanced user. I assure you that you won't want to switch to another distro after you understand how good Arch is. For me personally, it's the best desktop distribution, suitable for the needs of any person who wants to turn A PC into a tool for solving complex tasks.
I wish to note two important features:
- Arch comes out of the box without a huge amount of software (yeah, even without a graphical interface). Only you decide how your computer will look and what programs it will use (not someone else for you).
- It's well suited for learning Linux. You are getting to know the Linux operating system better, not as a complete system, but as a set of components.
Arch is a rolling-release system. But what does this mean? In short, the system allows us, users, to always have the latest versions of the applications we install. By the way, this is why Arch is often blamed of instability. My experience of using doesn't confirm that. All the times that i was breaking my Linux, it was due my stupidity and ignorance, not dependency problems.
Who is Arch Linux for? It's not necessary to have huge amount of experience with Linux to install and use this distribution. In that sense, Arch may well be the first system, you shouldn't fear. But I want to warn you: if you are not a programmer or don't want to understand (read - you aren't interested in) how Arch and Linux work, then this distro isn't for you.
If you want more and want to build your own custom Linux system, I advise you to pay attention to Linux From Scratch.
Installation
Why is this article needed, if we have official installation guide? It is really good, but there a lot of detailed instructions that i don't need (and probably you too). In case of any problems, please use it.
NOTE: the installation example below isn't the only correct one. It was created by the author based on Archlinux Wiki, other articles and personal experience.
NOTE 2: I am going to install Arch on UEFI machine. If you don't know the difference between BIOS and UEFI, you should read about it. When installing to use UEFI it's important to boot the installation media in UEFI mode, otherwise efibootmgr(8) will not be able to add the GRUB UEFI boot entry. To do this, you should disable the CSM in your hardware settings.
Let's get down to business. For installation we need Live CD/USB with distro. The internet is full of examples of how to create a Live USB, it all depends on your current operating system and own skills. You can download the installation image from official download page.
Boot the live environment
Boot from the Arch Linux installation medium. When boot loader menu appears, select Arch Linux install medium by pressing Enter.

You will be logged into the first virtual console as the root user.
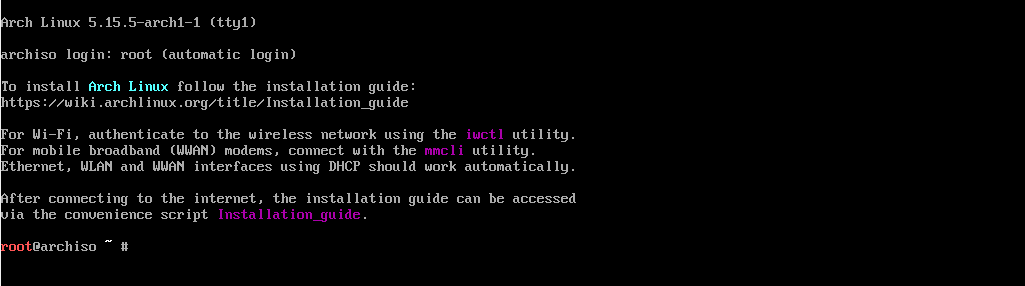
We have booted into a system that contains all initial packages required for configuration.
Check network connection
An network connection is required to install Arch.
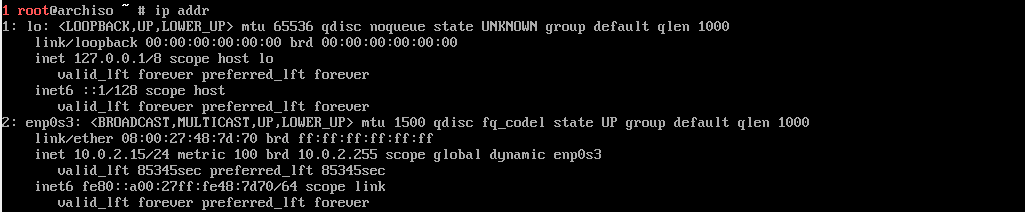
Let's print addresses assigned to all network interfaces. Probably there are 2 interfaces: loopback (lo or loX) and network (enoX/ensX/enpXsX/ethX or others). By default, udev assigns names to your network interfaces using Predictable Network Interface Names, which prefixes interfaces names with en (wired/Ethernet), wl (wireless/WLAN), or ww (WWAN).
# ip addr
We can check the connection by using the ping command to an available host on the network:
# ping archlinux.org

NOTE: use CTRL+C to interrupt the current app (in our case - ping)
If you have problems at this stage, try the following command:
# dhclient -v enp0s3
Replace enp0s3 with you network interface (from the output of the ip addr)
Update the system clock
Enable network time synchronization:
# timedatectl set-ntp true
Partition the disk
The system recognizes disks and assigns them to a block devices such as /dev/sdX, /dev/nvmeXnX, /dev/mmcblkX/. To identify these devices, use lsblk(8) or fdisk(8).
# lsblk

The following partitions are required for a chosen device:
- One partition for the root directory:
/. - EFI system partition.
There are a huge number of layouts (example). I personally use the following layout:
| Partition | Partition type | Suggested size | Comment |
|---|---|---|---|
| / | Linux x86-64 root (/) | 8-64 GiB | Root, the main partition for the filesystem |
| /boot | EFI system partition | 512 MiB | Bootloader files |
| /home | Linux | Remaining device space | User files |
| swap | Linux swap | 1 GiB or more if you have small amount of RAM | Swap partition, for unloading pages from RAM when it's full |
Let's use a pseudo-graphic app for managing disk partitions. When application menu appears, select gpt by pressing Enter:
# cfdisk /dev/sda
Replace /dev/sda with your block device.

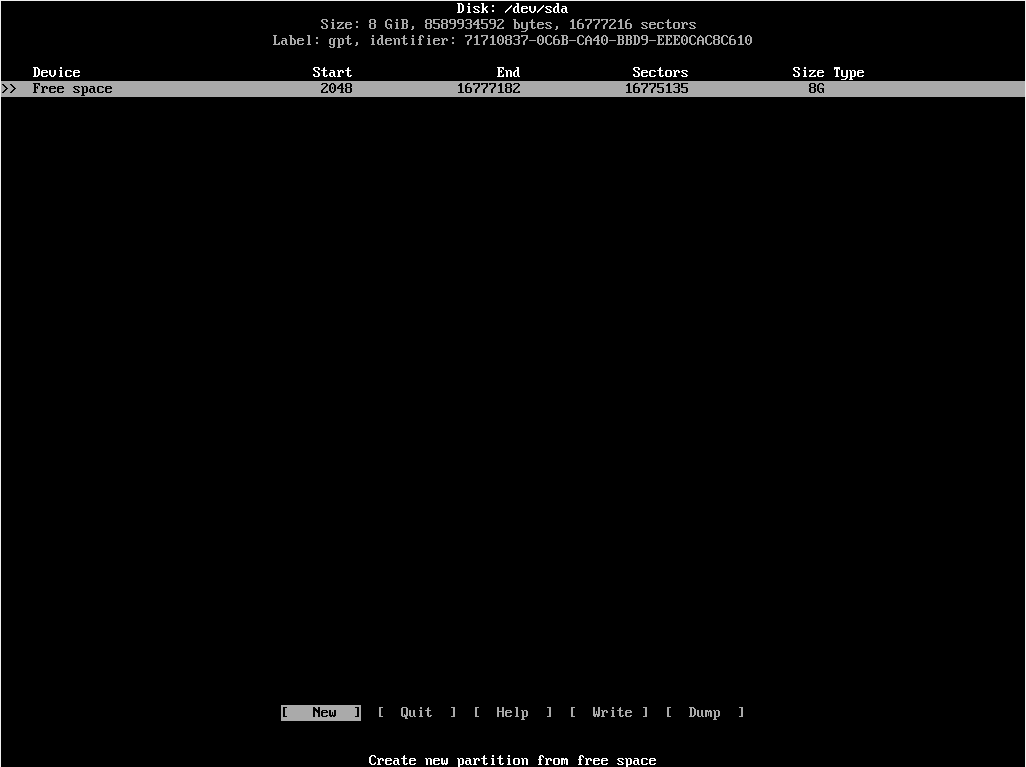
Because it's graphical app, i hope you will figure out how to use it yourself. Don't forget write partition table to disk! You should have something like this:
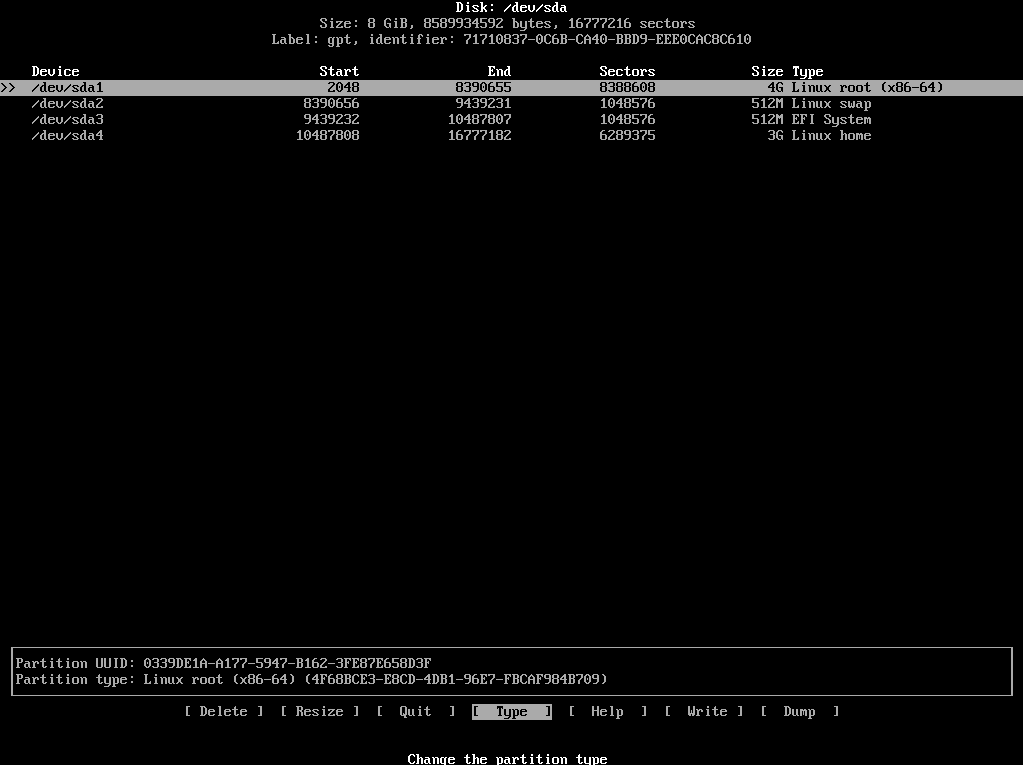
Format the partitions
Once the partitions have been created, each newly created partition must be formatted with an appropriate file system. We will use ext4 as main filesystem.
# mkfs.ext4 /dev/sda1 # linux root
# mkfs.ext4 /dev/sda4 # linux home

The EFI system partition must be formatted to FAT32:
# mkfs.fat -F 32 /dev/sda3
Initialize the swap partition and activate it:
# mkswap /dev/sda2
# swapon /dev/sda2

Mount the file systems
Mount the root volume to /mnt:
# mount /dev/sda1 /mnt
Create remaining mount points using mkdir(1) and mount their corresponding volumes:
# mkdir /mnt/boot
# mkdir /mnt/home
# mount /dev/sda3 /mnt/boot
# mount /dev/sda4 /mnt/home
Install essential packages
Download the necessary packages for the system to work:
# pacstrap /mnt base linux linux-firmware
base - all the minimum necessary utilities.
linux - the Linux kernel and modules.
linux-firmware - firmware binary blobs necessary for partial or full functionality of certain hardware devices.
Generate an fstab file
# genfstab -U /mnt >> /mnt/etc/fstab
Change root
Change root of the file system. The specified FS will be main. This means that we can only run commands that we have installed with pacstrap.
# arch-chroot /mnt
Make sure everything is OK
Note that our kernel and initramfs (the filesystem in RAM that helps the kernel to start) are already installed and located in /boot:
# ls /boot

If you don't have this files (or similiar), you have done something wrong. Try it again :(
Time
Set the time zone:
# ln -sf /usr/share/zoneinfo/Region/City /etc/localtime
Synchronize OS time with system (UEFI) time:
# hwclock --systohc
You can use date and hwclock to check time.
Install a text editor
GNU nano is a small editor for on the terminal.
# pacman -S nano
Localization
Before a locale can be enabled on the system, it must be generated. This can be achieved by uncommenting desired entries in /etc/locale.gen and running locale-gen(8). Let's uncomment en_US.UTF-8 UTF-8 for American-English, save the file and generate the locale:
# nano /etc/locale.gen
# locale-gen
NOTE: use CTRL + W for searching.
Root password
Set the root password. No characters appear when you type your password, but you are actually typing your password. That is a little extra security.
# passwd root
Network management
A NetworkManager lets you manage network connection settings in so called network profiles to facilitate switching networks. For work it needs DHCP client, I prefer to use dhclient.
# pacman -S networkmanager dhclient
Arch uses systemd (initialization system and service manager, btw it's the huge and awful thing). Let's make running NetworkManager at startup using systemctl(1):
# systemctl enable NetworkManager
# systemctl start NetworkManager
Install a boot loader
A boot loader is required to start the system. GNU GRUB - is the most popular boot loader. efibootmgr(8) is a tool for managing UEFI boot entries.
# pacman -S grub efibootmgr
# grub-install --target=x86_64-efi --efi-directory=/boot --bootloader-id=GRUB
# grub-mkconfig -o /boot/grub/grub.cfg
Reboot
Exit the chroot environment, unmount all the partitions and restart PC:
# exit
# umount /mnt/home
# umount /mnt/boot
# umount /mnt
# shutdown -r now
Remove the installation medium and then login into the new system with the root account.
Post-installation
Congratulations! Now you have an installed operating system, all that remains is to customize it to YOUR taste. Before you go any further, read about package manager called pacman.
IMPORTANT NOTE: that part of the guide is presented for review, here I install the software that good option for my tasks. It's up to you to use them or not. I will give you some alternatives along the way.
Add a new user
sudo is a program that allows a root to delegate user the ability to run command as another user (by default the root).
# pacman -S sudo
Allow members of group wheel sudo access. This can be achieved by uncommenting %wheel ALL=(ALL) ALL in /etc/sudoers. Let's do it:
# nano /etc/sudoers
Create a new user and make it an administrator:
# useradd -m username
# passwd username
# usermod -a -G wheel username
Replace username with your nickname.
Windowing system (GUI)
Graphical User Interface is a system of components. Main components:
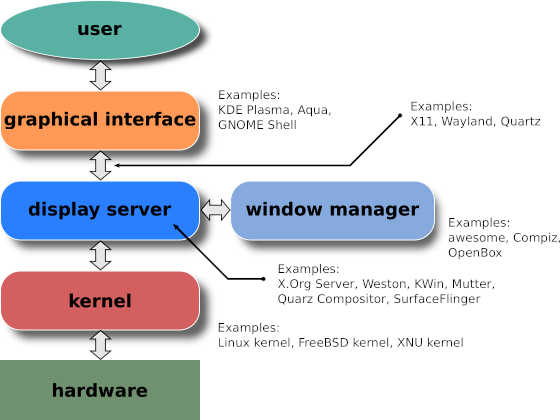
Display server
A display server is program, that implements specific display server protocol (for example: X11, Wayland). It's like an abstaction layer between hardware and display clients (your applications). We are going to use X.Org, that use X11 protocol:
# pacman -S xorg-server xorg-xinit <driver package>
You can find out what <driver package> you need here.
Window manager
A window manager is system software that controls the placement and appearance of windows within a windowing system in a graphical user interface (GUI). It can be part of a desktop environment (DE) or be used standalone.
I really like i3 and use it. Why should i use i3wm?
# pacman -S i3 i3status rofi
$ echo 'exec i3' >> ~/.xinitrc
Desktop environment
Desktop environment is a bundle of programs aimed to implement desktop metaphor. i3 can work standalone so i don't use any DE. My first DE was simple Mate and I can recommend it to you.
Display manager
A display manager is a graphical login manager that is displayed at the end of the boot process in place of the default shell. I prefer not to use it. But if you want, i advise you to pay attention to CDM.
Sound system
Applications don't know how to communicate directly with hardware, so we need an abstract layer. This is done by Advanced Linux Sound Architecture (ALSA) succeeded the older Linux port of the Open Sound System.
ALSA provides a basic audio interface that allows you to do primitive actions. To expand the functionality (for example, play muptiple audio streams at the same time), we need a Sound server. PulseAudio is popular choice, usually it works out of the box. Also I install PulseAudio Volume Control, it's the GUI mixer.
# pacman -S pulseaudio pulseaudio-alsa pavucontrol
# usermod -a -G audio username
Fonts
# pacman -S noto-fonts ttf-dejavu ttf-droid ttf-font-awesome ttf-opensans ttf-hack